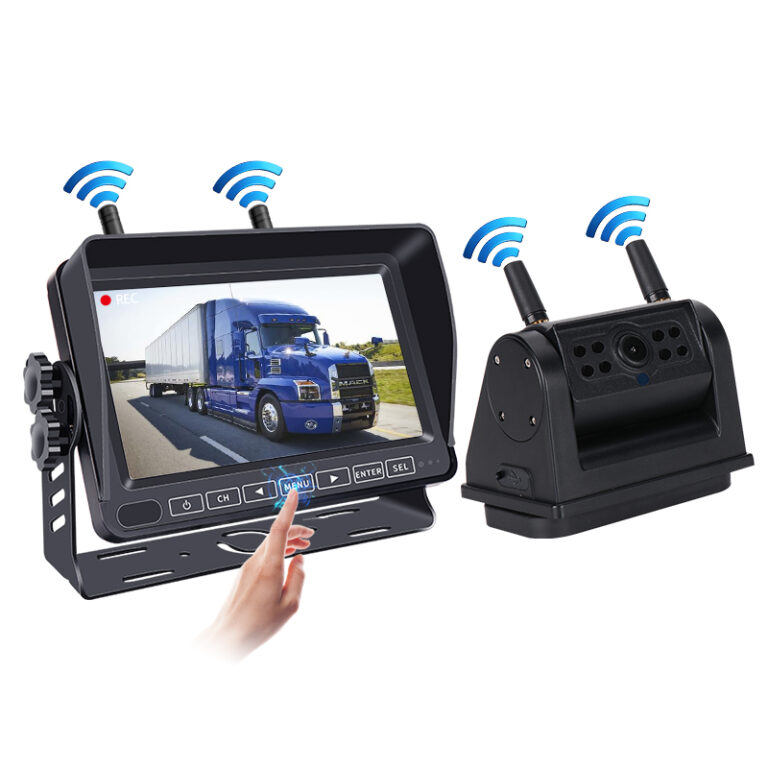
How to Install a Wireless Car Rear View Camera: A Step-by-Step Guide
Wireless car rear-view cameras improve safety and convenience by eliminating blind spots while reversing. Unlike wired systems, these cameras don’t require running long cables through your vehicle, making installation easier. In this guide, we’ll walk you through the step-by-step installation process, discuss wiring color codes, and provide troubleshooting tips to ensure your system works flawlessly.
How to Install a Wireless Backup Camera (Quick Answer)
To install a wireless backup camera, first mount the camera on the rear of your vehicle, typically near the license plate. Secure the monitor on your dashboard or windshield. Connect the camera to the vehicle’s reverse light for power. Sync the camera and monitor using the wireless transmitter. Adjust the settings and test the system to ensure a clear signal and optimal view.
Step 1: Unbox and Check the Components
Before installation, verify that your kit includes:
✅ Wireless rear-view camera
✅ LCD monitor (dashboard/windshield mount)
✅ Wireless transmitter & receiver
✅ Power cables
✅ Mounting brackets and screws
✅ User manual
Ensure all parts are present and functional before proceeding.
Step 2: Choose the Right Mounting Location
🔹 License Plate Frame: Most wireless cameras attach near the license plate.
🔹 Bumper Mount: Some models are designed to fit within the rear bumper.
🔹 Overhang Mount: Ideal for larger vehicles like RVs and trucks.
📌 Tip: Ensure the camera angle covers a wide field of view and is free from obstructions like tow hitches.
Step 3: Install the Camera on the Rear of the Vehicle
1️⃣ Clean the mounting area with alcohol to ensure a firm hold.
2️⃣ Attach the bracket using screws or adhesive (depending on the model).
3️⃣ Secure the camera in place and adjust the viewing angle.
4️⃣ Route the power cable toward the nearest taillight assembly.
Step 4: Connect the Camera to Power (Reverse Light Wiring)
Your camera needs power, typically from the vehicle’s reverse light wiring.
Understanding Reversing Camera Wiring (Color Codes Explained)
- Red: Connects to the +12V power (reverse light positive).
- Black: Connects to ground (vehicle chassis or reverse light negative).
- Yellow: Video signal cable (if applicable for a hybrid wired-wireless setup).
How to Connect:
1️⃣ Locate the reverse light in your taillight assembly.
2️⃣ Remove the cover and find the positive (+) and negative (-) wires.
3️⃣ Splice the red wire from the camera into the reverse light positive (+).
4️⃣ Connect the black wire to the vehicle’s ground (-).
5️⃣ Use electrical tape or heat shrink tubing to secure connections.
📌 Tip: When the vehicle is put in reverse, the camera will now automatically turn on.
Step 5: Install the Monitor on the Dashboard or Windshield
1️⃣ Choose a mounting location (dashboard, windshield, or rearview mirror).
2️⃣ Attach the mount securely using adhesive or screws.
3️⃣ Power the monitor through a cigarette lighter plug or a fuse tap connection.
Step 6: Connect the Wireless Transmitter & Sync the System
🔹 For a built-in transmitter camera: It will automatically send a signal to the monitor when powered.
🔹 For external transmitters: Connect the transmitter to the camera, then place it near the rear of the vehicle for a stronger signal.
Pair the camera and monitor by following the user manual. Most systems will automatically sync, but some may require manual pairing through the settings menu.
📌 Tip: Avoid metal obstructions between the transmitter and receiver to prevent interference.
Step 7: Adjust Settings & Test the System
✔️ Shift the car into reverse and check if the camera feed appears on the monitor.
✔️ Adjust the camera angle for a clear, wide-angle view.
✔️ Fine-tune brightness, contrast, and parking guidelines if available.
📌 Tip: If the image is blurry, clean the camera lens and ensure no objects block the signal.
Troubleshooting Common Wireless Backup Camera Issues
❌ No Signal / Black Screen
✅ Check power connections to the camera and monitor.
✅ Ensure the transmitter and receiver are within range (avoid metal obstructions).
✅ Try re-pairing the camera and monitor.
❌ Interference / Flickering Screen
✅ Move the wireless transmitter away from radio signals or metal parts.
✅ Ensure there are no strong WiFi/Bluetooth signals causing interference.
✅ Check if the transmitter’s antenna is properly extended.
❌ Blurry or Distorted Image
✅ Clean the camera lens with a microfiber cloth.
✅ Adjust the camera’s angle and focus if possible.
✅ If using a low-quality monitor, consider upgrading for a better resolution.
Can You Install a Wireless Backup Camera Yourself?
Yes! Most wireless backup cameras are designed for DIY installation. If you’re comfortable working with 12V electrical wiring and mounting the camera properly, you can install it yourself in 30–60 minutes.
However, if you’re installing it on a large vehicle (RV, truck, commercial vehicle), a professional installation may be recommended for a stronger, interference-free connection.
FAQ: Wireless Backup Camera Installation
🔹 How do I connect a wireless backup camera to a head unit?
If your car’s head unit supports wireless video input, you can pair the camera directly. Otherwise, use an RCA adapter or wireless transmitter.
🔹 Can I install a backup camera without drilling holes?
Yes, many cameras come with adhesive mounts or license plate brackets to avoid drilling.
🔹 Will a wireless backup camera work in bad weather?
High-quality cameras with IP67/IP68 waterproof ratings work in rain, snow, and fog.
Final Thoughts: Get the Best Wireless Backup Camera for Your Vehicle
Installing a wireless car rear-view camera enhances safety, convenience, and visibility while reversing. By following this step-by-step installation guide, you can set up your camera efficiently and troubleshoot any issues along the way.
Looking for a high-quality wireless backup camera with top-tier performance and fast delivery? RIS Vision provides customizable, cutting-edge rear-view camera solutions for dealers, businesses, and vehicle owners worldwide.
📩 Contact us for bulk orders or technical support: ellen@risvision.com

